

Note: A console-initiated deployment requires a network Deployment Package. If you haven't already create one, see the Create a Deployment Package article in the Boot Media section of the User's Guide.
Note: If you wish to perform a USB deployment please check out the following article Start a USB Deployment.
Start the Console-Initiated Deployment
- In the Computer Management workspace of the SmartDeploy Console, identify one or more computers that you want to deploy your image to.
Note: Clients that appear in the Computer Management workspace in gray or faded text indicate that the device is off or there's another issue preventing a full connection between the console host and client. Deployments won't work when clients are in this state. Please see the Advanced Configuration and Troubleshooting section for more information.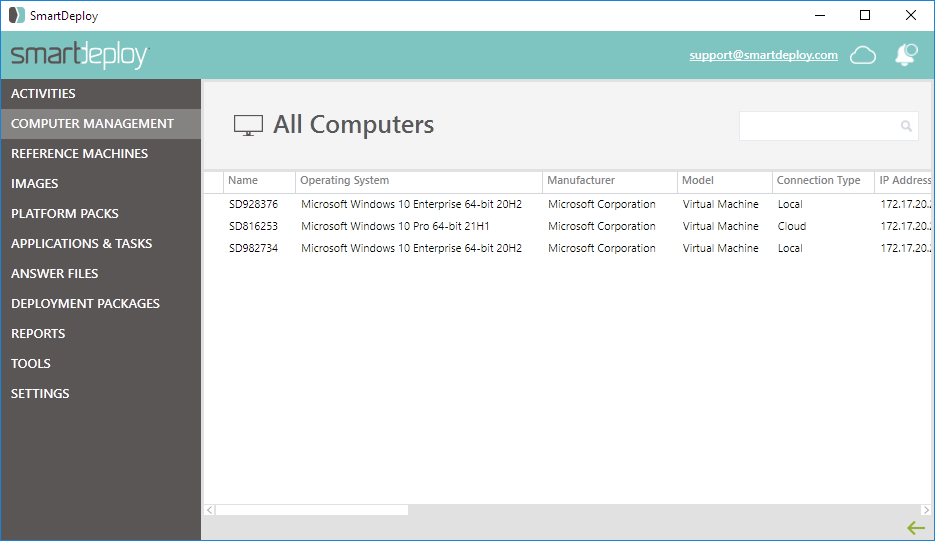
- Click to select the client(s) that you want to deploy to, and then click Deploy Image.
Note: You can use Control or Shift to select multiple clients.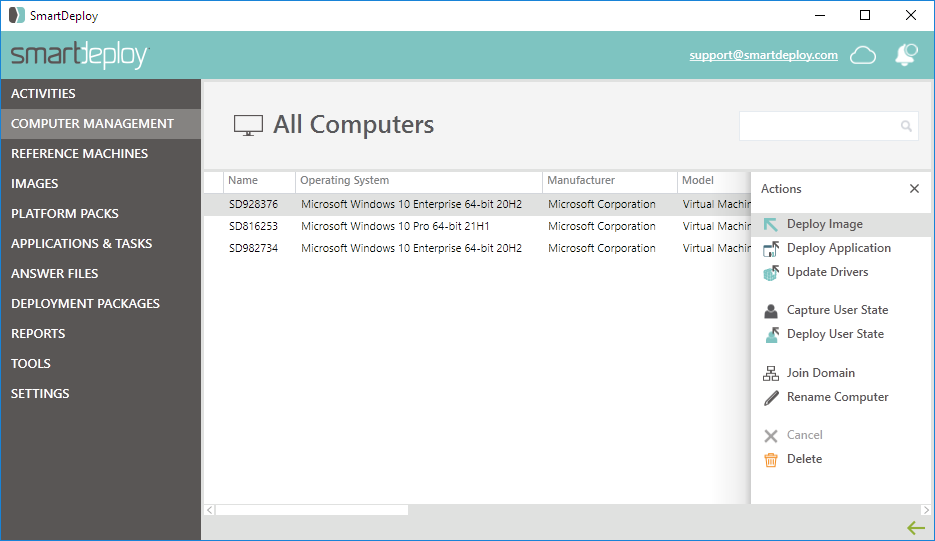
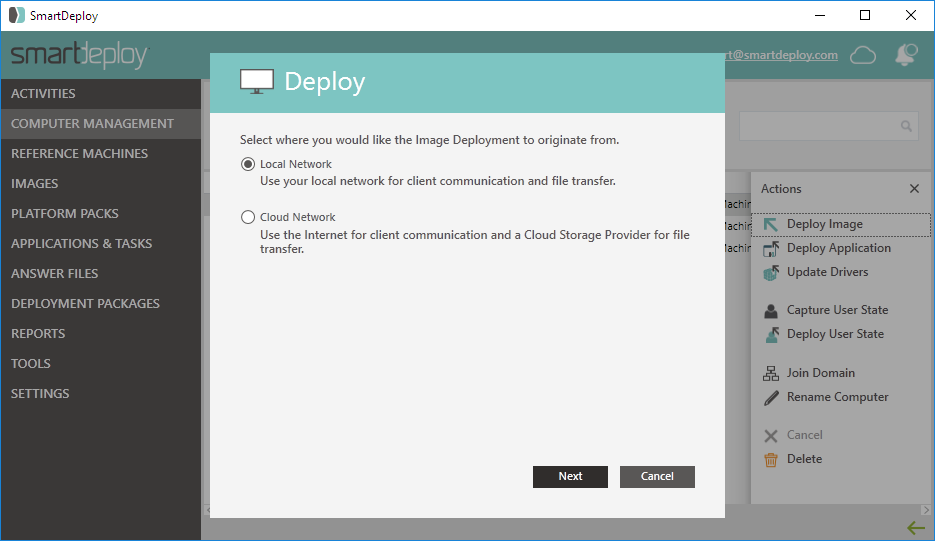
- Select Local Network or Cloud Network for the network you would like the deployment to originate from.
Note: Please see out Cloud Services section for more information on Cloud Deployments.
- In Deployment Package, select the Deployment Package that you want to use for this deployment.
- Review the Deployment Package information, and adjust the optional settings as needed.
Note: The version of the SmartDeploy Client and the version of the SmartDeploy Console in which the Deployment Package was created must match. You'll receive a warning if they don't match.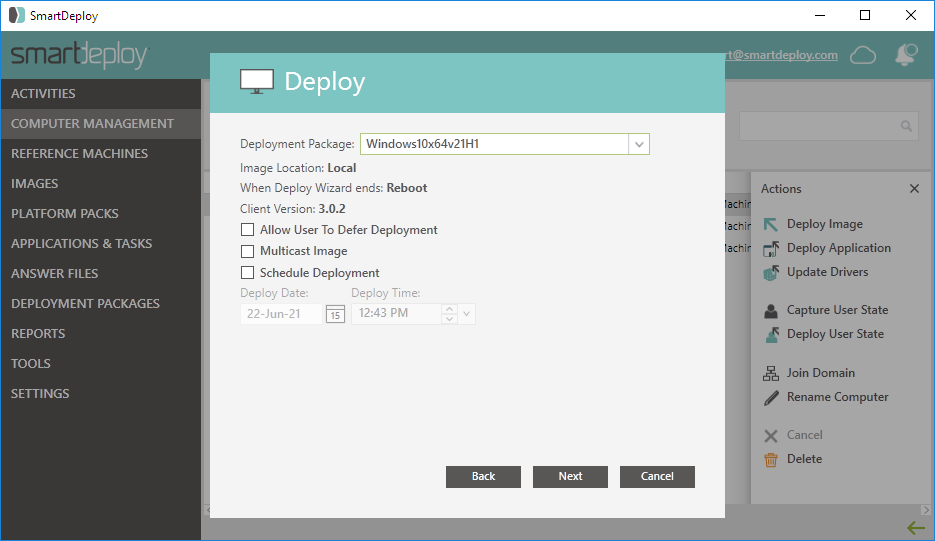
- Click Next to continue.
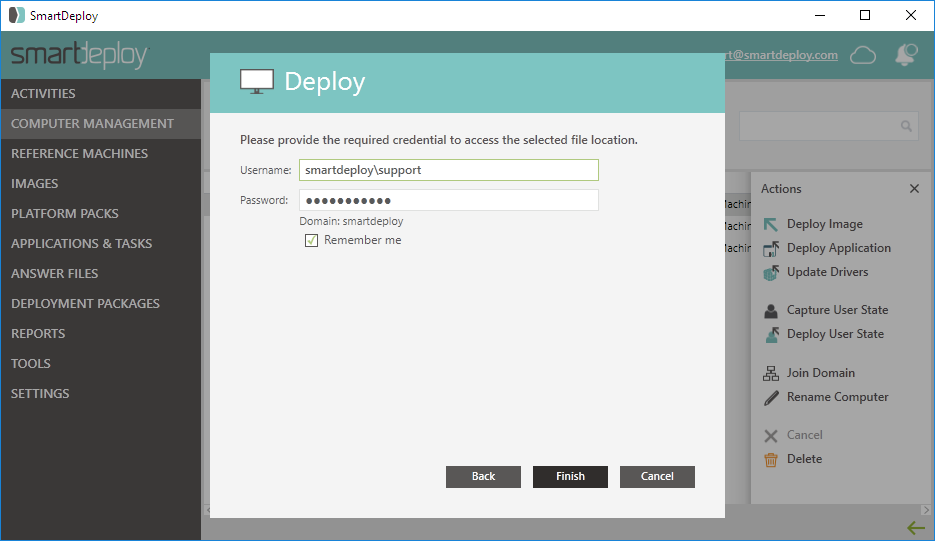
-
Specify the credentials of an account with access to the selected file location and then click Finish and then click OK to confirm.
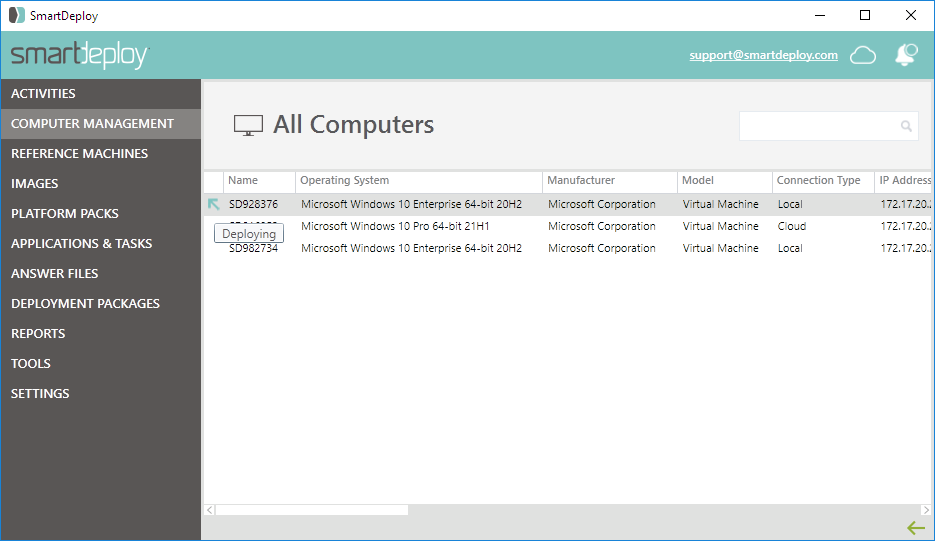
- When the deployment starts, a blue arrow icon is displayed next to the client(s).
Next: Step 4: Deploy an Application